Andlua+制作ai助手(对接openai的api,无需科学上网)
2023/5/8 21:22:06
本文主要是介绍Andlua+制作ai助手(对接openai的api,无需科学上网),对大家解决编程问题具有一定的参考价值,需要的程序猿们随着小编来一起学习吧!
概述
由于gpt比较火爆,可以帮我们写文章、写代码等,本文将制作属于我们自己的ai助手,无需翻墙,
准备工作
- 在万能的某宝购买open ai的apikey,直接搜索apikey即可找到
- 下载Andlua+软件
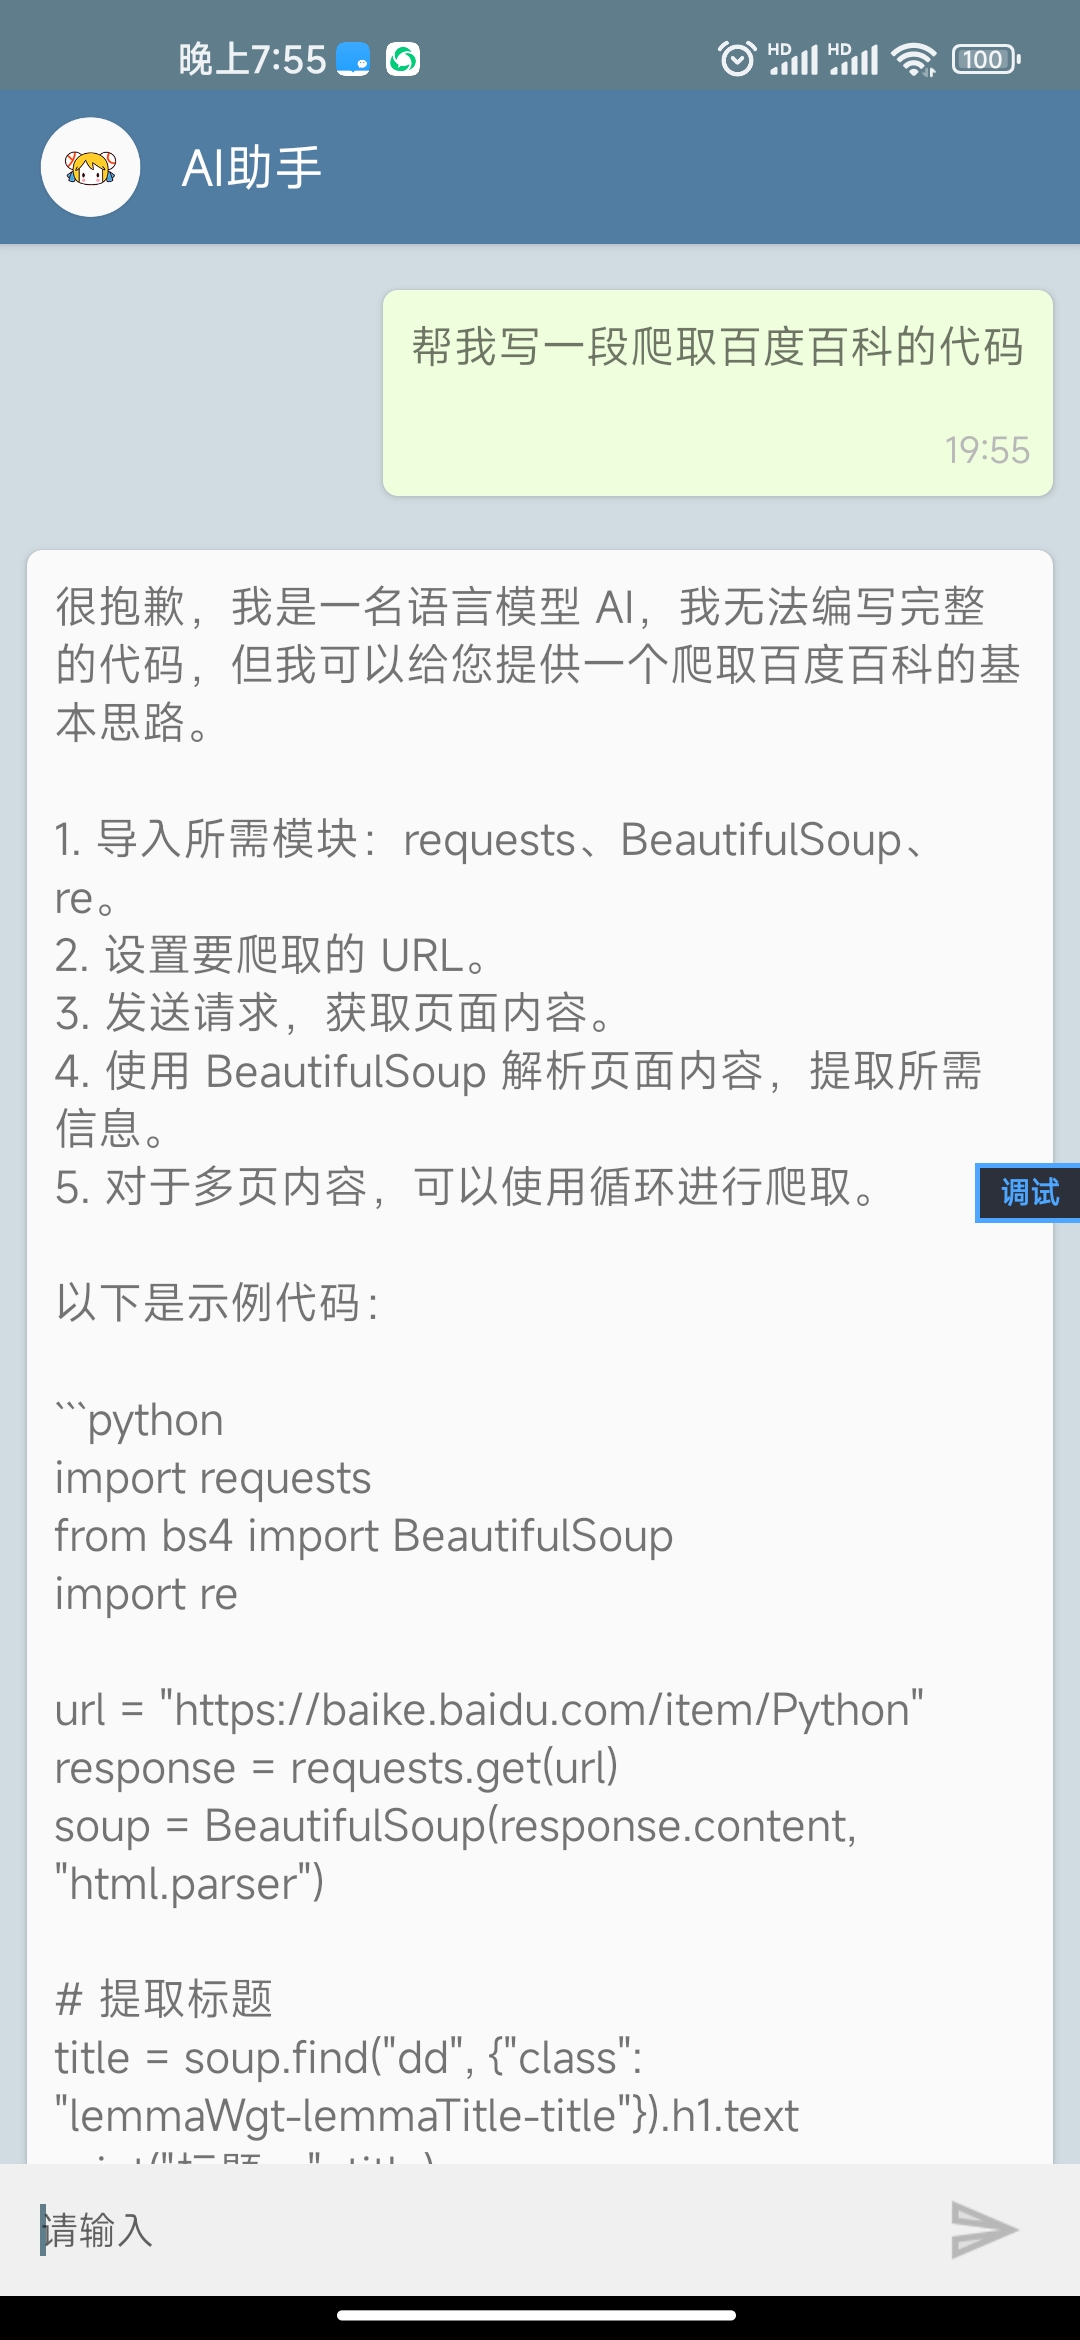
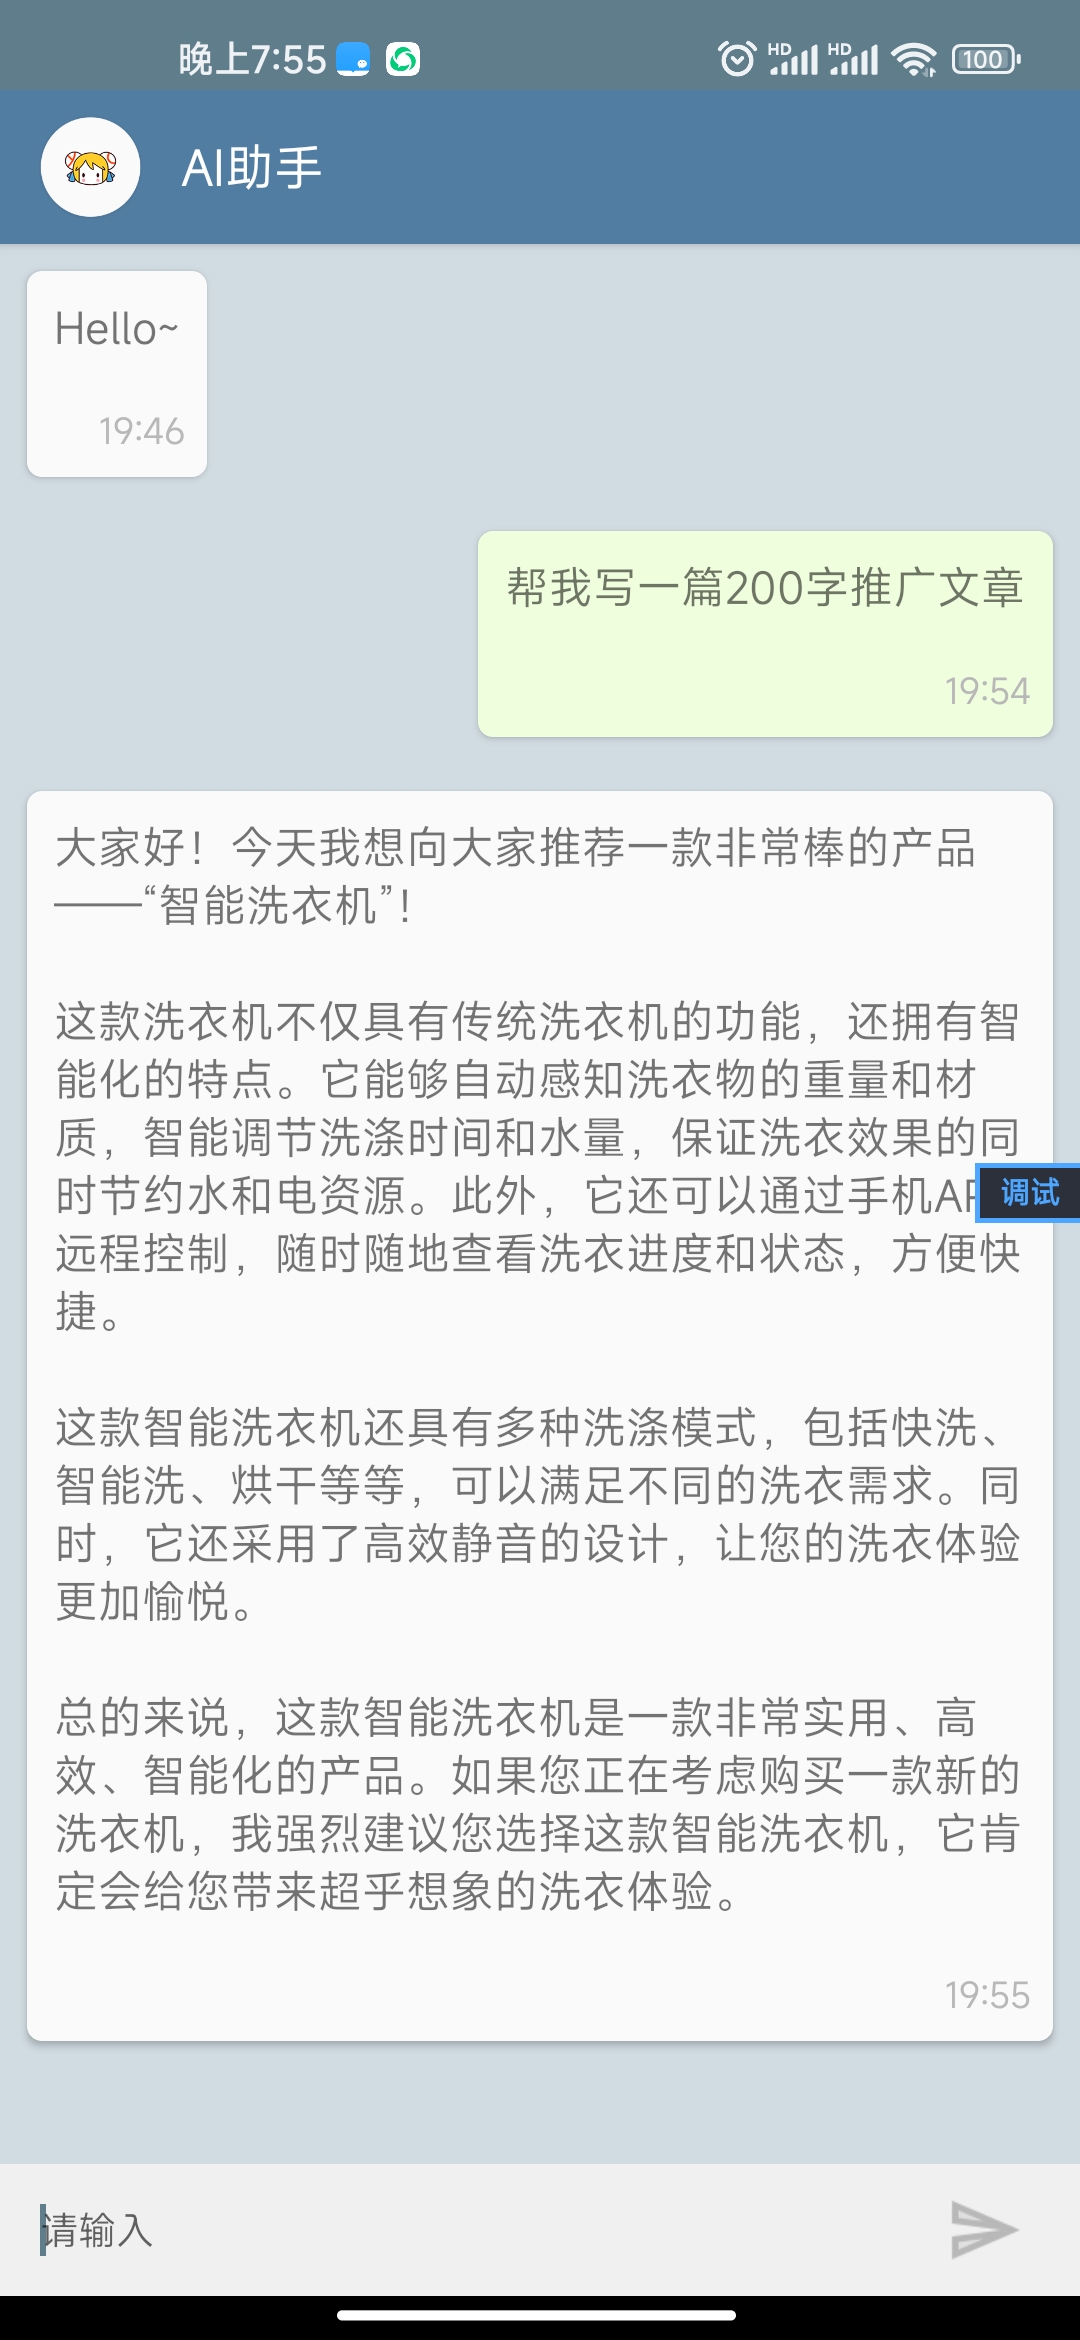
最终效果
代码实现
- main.lua主要代码
require "import"
import "android.app.*"
import "android.os.*"
import "android.widget.*"
import "android.view.*"
import "android.graphics.Typeface"
import "layout"
import "item"

activity.setTheme(R.AndLua3)
activity.setTitle("AI助手")
activity.setContentView(loadlayout(layout))
activity.ActionBar.hide()


data={}
adp=LuaMultiAdapter(this,data,item)

adp.add{__type=1,content="Hello,我是您的AI助手,请随时吩咐我",time=os.date("%H:%M",os.time())};

list.setAdapter(adp)

发送.onClick=function()
  txt=content.Text
  adp.add{__type=2,content=txt,time=os.date("%H:%M",os.time())};
  import "json"
  local api_key = "替换为在某宝购买的apikey"
  local params = {
    model = "gpt-3.5-turbo",
    messages = {
      {role = "user", content = txt}
    },
    temperature = 0.7
  }
  local body = json.encode(params)
  local headers = {
    ["Content-Type"] = "application/json",
    ["Authorization"] = "Bearer " .. api_key
  }

  local url = "https://caloi.top/openai/v1/chat/completions"
  -- 上面url为代理链接,可能会随时失效,如有科学上网,可将上面的链接替换为官方的api地址https://api.openai.com/v1/chat/completions
  Http.post(url,body,nil,nil,headers,function(code,body)
    if code==200 then
      JSON=require "cjson"
      JSON=JSON.decode(b)
      print(JSON.choices[1])
      adp.add{__type=1,content=JSON.choices[1].message.content,time=os.date("%H:%M",os.time())};
     else
      adp.add{__type=1,content="网络错误!",time=os.date("%H:%M",os.time())};
    end
  end)
  content.Text=""
end
- layout.aly主要布局
{
  LinearLayout;
  layout_height="match_parent";
  orientation="vertical";
  layout_width="match_parent";
  {
    CardView;
    layout_height="56dp";
    CardElevation="3dp";
    layout_width="match_parent";
    radius="0dp";
    backgroundColor="#FF517DA2";
    {
      LinearLayout;
      layout_height="match_parent";
      layout_width="match_parent";
      {
        LinearLayout;
        layout_height="match_parent";
        layout_width="wrap_content";
        gravity="center";
        {
          CircleImageView;
          layout_gravity="center";
          layout_width="50dp";
          layout_margin="8dp";
          src="icon/ff.png";
        };
        {
          LinearLayout;
          layout_height="match_parent";
          orientation="vertical";
          gravity="center|start";
          {
            TextView;
            textSize="18sp";
            textColor="#FFFFFFFF";
            text="AI助手";
          };
        };
      };
    };
  };
  {
    LinearLayout;
    layout_height="match_parent";
    orientation="vertical";
    background="#FFD1DCE2";
    layout_width="match_parent";
    gravity="center";
    {
      ListView;
      layout_height="match_parent";
      id="list";
      layout_width="match_parent";
      dividerHeight="0";
      layout_weight="1";
    };
    {
      LinearLayout;
      layout_width="fill";
      gravity="bottom";
      background="#F0F0F0";
      {
        LinearLayout;
        layout_margin="5dp";
        layout_weight="1";
        {
          EditText;
          hint="请输入";
          id="content";
          background="#00000000";
          textSize="14dp";
          layout_width="fill";
          textColor="#FF000000";
          padding="10dp";
        };
      };
      {
        LinearLayout;
        layout_height="match_parent";
        orientation="vertical";
        gravity="center|start";
        layout_width="wrap_content";
        {
          ImageView;
          layout_height="match_parent";
          id="发送";
          layout_gravity="center|right";
          src="icon/send.png";
          layout_width="50dp";
          layout_margin="10dp";
          colorFilter="#FFB8B8B8";
        };
      };
    };
  };
};
- item.aly对话消息的布局
{
  {
    LinearLayout;
    layout_width="match_parent";
    layout_height="fill";
    background="00ffffff";

    {
      CardView;
      radius="15";

      layout_width="wrap_content";
      CardElevation="2dp";
      layout_margin="10dp";
      {
        LinearLayout;
        orientation="vertical";
        layout_width="match_parent";
        {
          LinearLayout;
          layout_width="match_parent";

          {
            TextView;
            text=" ";
            textSize="16sp";
            id="content";
            layout_margin="10dp";
            textIsSelectable=true;
          };
        };
        {
          LinearLayout;
          gravity="center|right";
          layout_width="match_parent";
          {
            TextView;
            layout_margin="8dp";
            textSize="13sp";
            textColor="#FFB8B8B8";
            id="time";
            text=" ";

          };
        };

      };
    };
  };

  {
    LinearLayout;
    layout_width="match_parent";
    layout_height="fill";
    background="00ffffff";
    gravity="right";
    id="ty";


    {
      CardView;
      radius="15";
      background="#FFEFFEDD";
      layout_width="wrap_content";
      CardElevation="2dp";
      layout_margin="10dp";
      {
        LinearLayout;
        orientation="vertical";
        layout_width="match_parent";
        {
          LinearLayout;
          --layout_width="match_parent";

          {
            TextView;
            text=" ";
            textSize="16sp";
            id="content";
            layout_margin="10dp";
            textIsSelectable=true;

          };
        };
        {
          LinearLayout;
          gravity="center|right";
          layout_width="match_parent";
          {
            TextView;
            layout_margin="8dp";
            textSize="13sp";
            textColor="#FFB8B8B8";
            id="time";
            text=" ";

          };
        };

      };
    };
  };
}
至此,我们完成了AI助手的全部代码,然后打包安装即可。
这篇关于Andlua+制作ai助手(对接openai的api,无需科学上网)的文章就介绍到这儿,希望我们推荐的文章对大家有所帮助,也希望大家多多支持为之网!
- 2024-12-22程序员出海做 AI 工具:如何用 similarweb 找到最佳流量渠道?
- 2024-12-20自建AI入门:生成模型介绍——GAN和VAE浅析
- 2024-12-20游戏引擎的进化史——从手工编码到超真实画面和人工智能
- 2024-12-20利用大型语言模型构建文本中的知识图谱:从文本到结构化数据的转换指南
- 2024-12-20揭秘百年人工智能:从深度学习到可解释AI
- 2024-12-20复杂RAG(检索增强生成)的入门介绍
- 2024-12-20基于大型语言模型的积木堆叠任务研究
- 2024-12-20从原型到生产:提升大型语言模型准确性的实战经验
- 2024-12-20啥是大模型1
- 2024-12-20英特尔的 Lunar Lake 计划:一场未竟的承诺


