RAG解决方案在Amazon Bedrock中的第八部分:将Amazon Cognito与Amazon EKS集成在一起
2024/10/12 21:02:46
本文主要是介绍RAG解决方案在Amazon Bedrock中的第八部分:将Amazon Cognito与Amazon EKS集成在一起,对大家解决编程问题具有一定的参考价值,需要的程序猿们随着小编来一起学习吧!
使用 AWS-CDK 将 Cognito 与 EKS 结合的实现的 GenAI 应用程序演示,展示如何实施
今天我们来谈一谈如何将 Amazon Cognito 集成到现有的 Amazon EKS 部署,以增强我们 GenAI 应用程序的功能。通过集成 Cognito,我们可以利用其认证和授权功能,从而提升应用程序的安全性和用户管理能力。
GenAI RAG(Bedrock + AOSS + SQS + Lambda)在使用 Cognito 和外部 DNS 的 EKS 集群上
- AWS 账户
- AWS CLI
- NodeJS
- Python
- AWS CDK
- 运行命令:
cdk bootstrap aws://ACCOUNT-NUMBER/REGION初始化 CDK 使用 - Visual Studio Code (或您喜欢的代码编辑器)
- Amazon Bedrock 访问
- Docker
- kubectl
- eksctl (选填此演示)
- git
- Route 53 域名及公共托管区域
查看EKS 蓝图 CDK 项目设置以了解最新支持的 AWS CDK 版本。
请先确保您已安装并初始化了AWS CDK,按照预设的先决条件。该项目的完整源代码可在我们的 GitHub 仓库 中找到。可以使用以下命令克隆 v0.8.0 版本的仓库:
git clone -b v0.8.0 https://github.com/awsdataarchitect/opensearch-bedrock-rag-cdk
    git clone -b v0.8.0 https://github.com/awsdataarchitect/opensearch-bedrock-rag-cdk.git && cd opensearch-bedrock-rag-cdk
    npm install
(这将会克隆特定分支的仓库,并安装npm依赖)
更新的变量有: 我们在 EKS 堆栈配置里添加了这些变量:userPoolClientId、userPoolArn、userPoolDomain 和 acmCertificate,以实现与 Cognito 的整合。
添加了 Cognito 堆栈(Stack): 堆栈现在已包含 Cognito 的配置,使 EKS 部署的认证功能更加强大。
以下是一个用于新配置的 config.ini 文件示例:
[设置]
domainName = rag-demo.example.com
hostedZoneId = ZF235GS3HYTHDSST9
targetPlatform = 目标平台
Cognito堆栈, 用于管理用户身份验证并生成用户池客户端凭证。
用户池: 创建一个新的用户池来管理应用的用户.
认知用户池客户端(Cognito 用户池客户端): 配置为使用OAuth2认证方式,并设置了回调URL到应用程序域。
SSL证书: 这会为应用程序域名颁发SSL证书,从而确保加密通信。
import { Construct } from 'constructs';
import * as cdk from 'aws-cdk-lib';
import * as cognito from 'aws-cdk-lib/aws-cognito';
import * as acm from 'aws-cdk-lib/aws-certificatemanager';
import { Lazy } from 'aws-cdk-lib';

interface 集群属性 extends cdk.StackProps {
    domainName: string;
    hostedZoneId: string;
}

export class CognitoStack extends cdk.Stack {
  public readonly cognitoUserPool: cognito.UserPool;
  public readonly cognitoUserPoolClient: cognito.UserPoolClient;
  public readonly cognitoUserPoolDomain: string;
  public readonly acmCertificate: string;

  constructor(scope: Construct, id: string, props: 集群属性) {
    super(scope, id, props);

    const domainName = props.domainName;
    const hostedZoneId = props.hostedZoneId;

    // 创建一个 Cognito 用户池
    const userPool = new cognito.UserPool(this, 'MyUserPool', {
      userPoolName: 'rag-demo-pool',
      selfSignUpEnabled: true, // 开启自助注册
      accountRecovery: cognito.AccountRecovery.EMAIL_ONLY, // 设置只通过电子邮件恢复账户
      signInAliases: { email: true }, // 设置电子邮件作为别名
      autoVerify: { email: true }, // 开启电子邮件自动验证
      removalPolicy: cdk.RemovalPolicy.DESTROY, // 当堆栈被销毁时移除用户池
    });

    const userPoolDomain = new cognito.UserPoolDomain(this, 'MyUserPoolDomain', {
      userPool,
      cognitoDomain: {
        domainPrefix: 'rag-demo', // 选择一个唯一的前缀
      },
    });

    // 构造注销 URL
    const redirectUri = encodeURIComponent(`https://${domainName}`);

    // 创建一个 Cognito 用户池客户端
    const userPoolClient = userPool.addClient('MyUserPoolClient', {
      userPoolClientName: 'rag-demo-client',
      idTokenValidity: cdk.Duration.days(1), // ID 令牌有效期为 1 天
      accessTokenValidity: cdk.Duration.days(1), // 访问令牌有效期为 1 天
      generateSecret: true, // 生成客户端密钥
      oAuth: {
        callbackUrls: [
          Lazy.string({ produce: () => `https://${domainName}/oauth2/idpresponse` }), // OAuth 回调 URL 1
          Lazy.string({ produce: () => `https://${domainName}` }), // OAuth 回调 URL 2
        ],
        flows: {
          authorizationCodeGrant: true, // 授权码授予
        },
        scopes: [cognito.OAuthScope.OPENID], // 范围:[开放标识]
      },
      supportedIdentityProviders: [cognito.UserPoolClientIdentityProvider.COGNITO], // 支持的身份提供者:
    });

    const hostedZone = cdk.aws_route53.HostedZone.fromHostedZoneAttributes(this, 'hosted-zone', {
      hostedZoneId: hostedZoneId,
      zoneName: domainName,
    });

    // 创建一个 SSL 证书
    const certificate = new acm.Certificate(this, 'MyCertificate', {
      domainName: domainName,
      validation: acm.CertificateValidation.fromDns(hostedZone), // 使用 DNS 验证证书
    });

    this.cognitoUserPool = userPool;
    this.cognitoUserPoolClient = userPoolClient;
    this.cognitoUserPoolDomain = userPoolDomain.domainName;
    this.acmCertificate = certificate.certificateArn

  }
}
Kubernetes Manifests: 更新的 YAML 定义,使用 Kubernetes ingress 资源部署具有 Cognito 集成的应用程序。
const ingress = cluster.addManifest('ingress', {
    apiVersion: 'networking.k8s.io/v1',
    kind: 'Ingress',  // Ingress 资源
    metadata: {  // 元数据:
        name: 'rag-ingress',
        annotations: {
            'alb.ingress.kubernetes.io/scheme': 'internet-facing',
            'alb.ingress.kubernetes.io/target-type': 'ip',
            'alb.ingress.kubernetes.io/auth-type': 'cognito',
            'alb.ingress.kubernetes.io/certificate-arn': this.acmCertificate,  // this 指的是当前对象的属性
            'alb.ingress.kubernetes.io/auth-idp-cognito': JSON.stringify({
                userPoolArn: this.userPoolArn,
                userPoolClientId: this.userPoolClientId,
                userPoolDomain: this.userPoolDomain,
            }),  // 将身份提供程序配置转换为 JSON 字符串
            //'alb.ingress.kubernetes.io/auth-session-timeout': '3600',  // 注释: 'alb.ingress.kubernetes.io/auth-session-timeout': '3600',
            //'alb.ingress.kubernetes.io/listen-ports': '[{"HTTP": 80}, {"HTTPS":443}]',  // 注释: 'alb.ingress.kubernetes.io/listen-ports': '[{"HTTP": 80}, {"HTTPS":443}]',
            //'alb.ingress.kubernetes.io/auth-session-cookie': 'AWSELBAuthSessionCookie',  // 注释: 'alb.ingress.kubernetes.io/auth-session-cookie': 'AWSELBAuthSessionCookie',
            //'alb.ingress.kubernetes.io/auth-on-unauthenticated-request': 'authenticate',  // 注释: 'alb.ingress.kubernetes.io/auth-on-unauthenticated-request': 'authenticate',
        },
    },
    spec: {
        ingressClassName: 'alb',  // ingress 类型为 alb
        rules: [
            {
                host: `${this.domainName}`,  // 主机域名
                http: {
                    paths: [
                        {
                            path: '/',
                            pathType: 'Prefix',
                            backend: {
                                service: {
                                    name: 'rag-service',
                                    port: { number: 443 },
                                },
                            },
                        },
                    ],
                },
            },
        ],
    },
});
要部署更新后的堆栈(stack),请运行下面的命令:
cdk deploy --all # 部署所有资源到CDK环境
如果 CDK 部署成功的话,您会看到一个 aws eks update-kubeconfig 命令来为新创建的 EKS 集群配置 kubectl。
aws eks update-kubeconfig --name bedrock-eks-cluster --region us-east-1 --role-arn arn:aws:iam::1234567890:role/mastersRoleArn
注:此命令用于更新kubeconfig文件,以便使用指定的Amazon EKS集群。
你可以用以下命令来验证部署:
kubectl get all
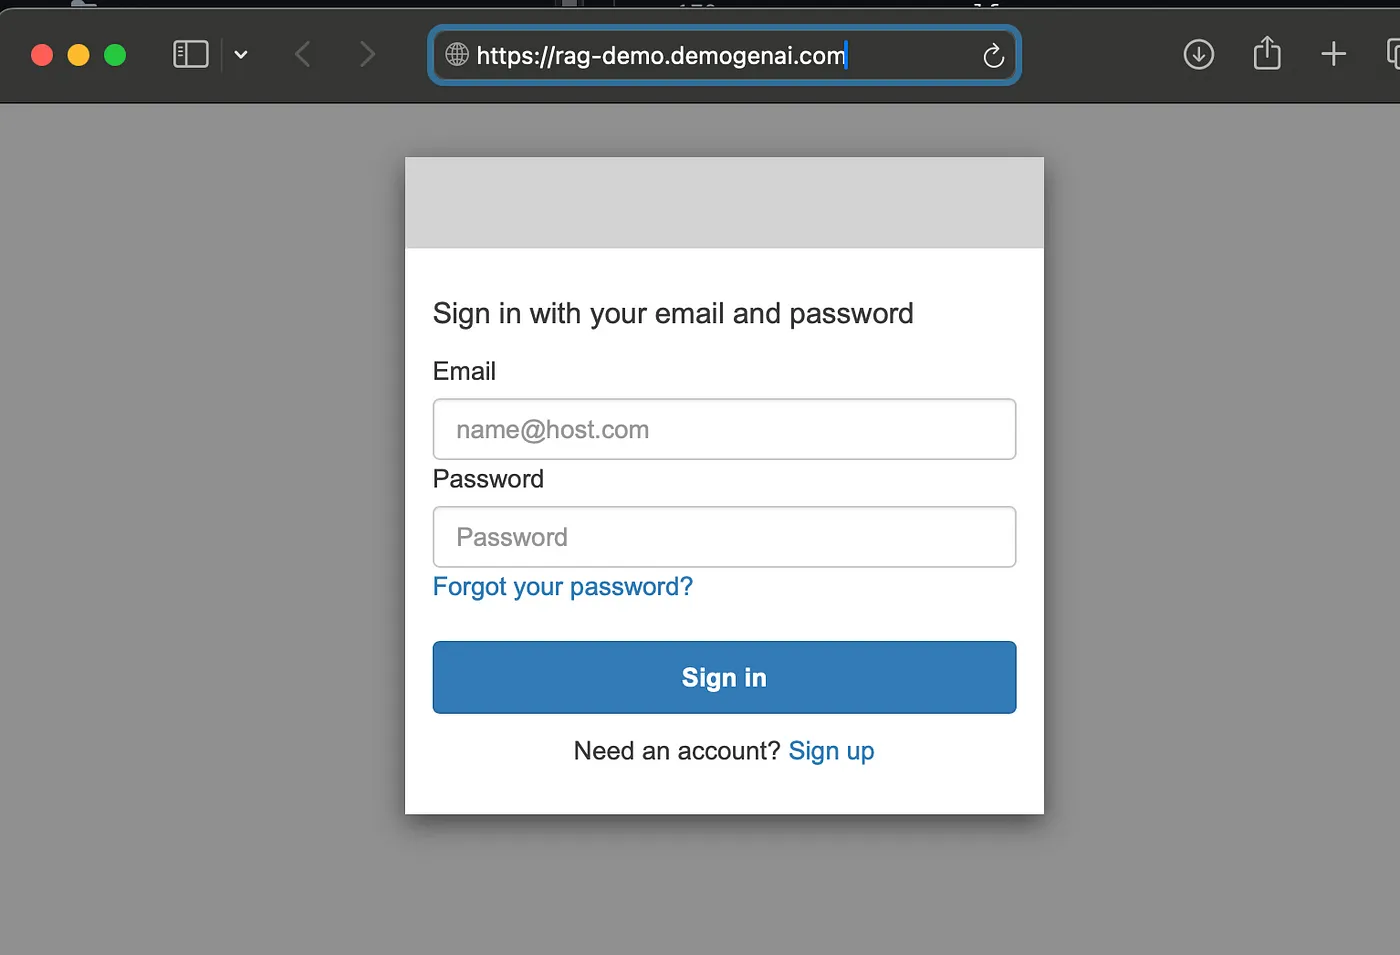
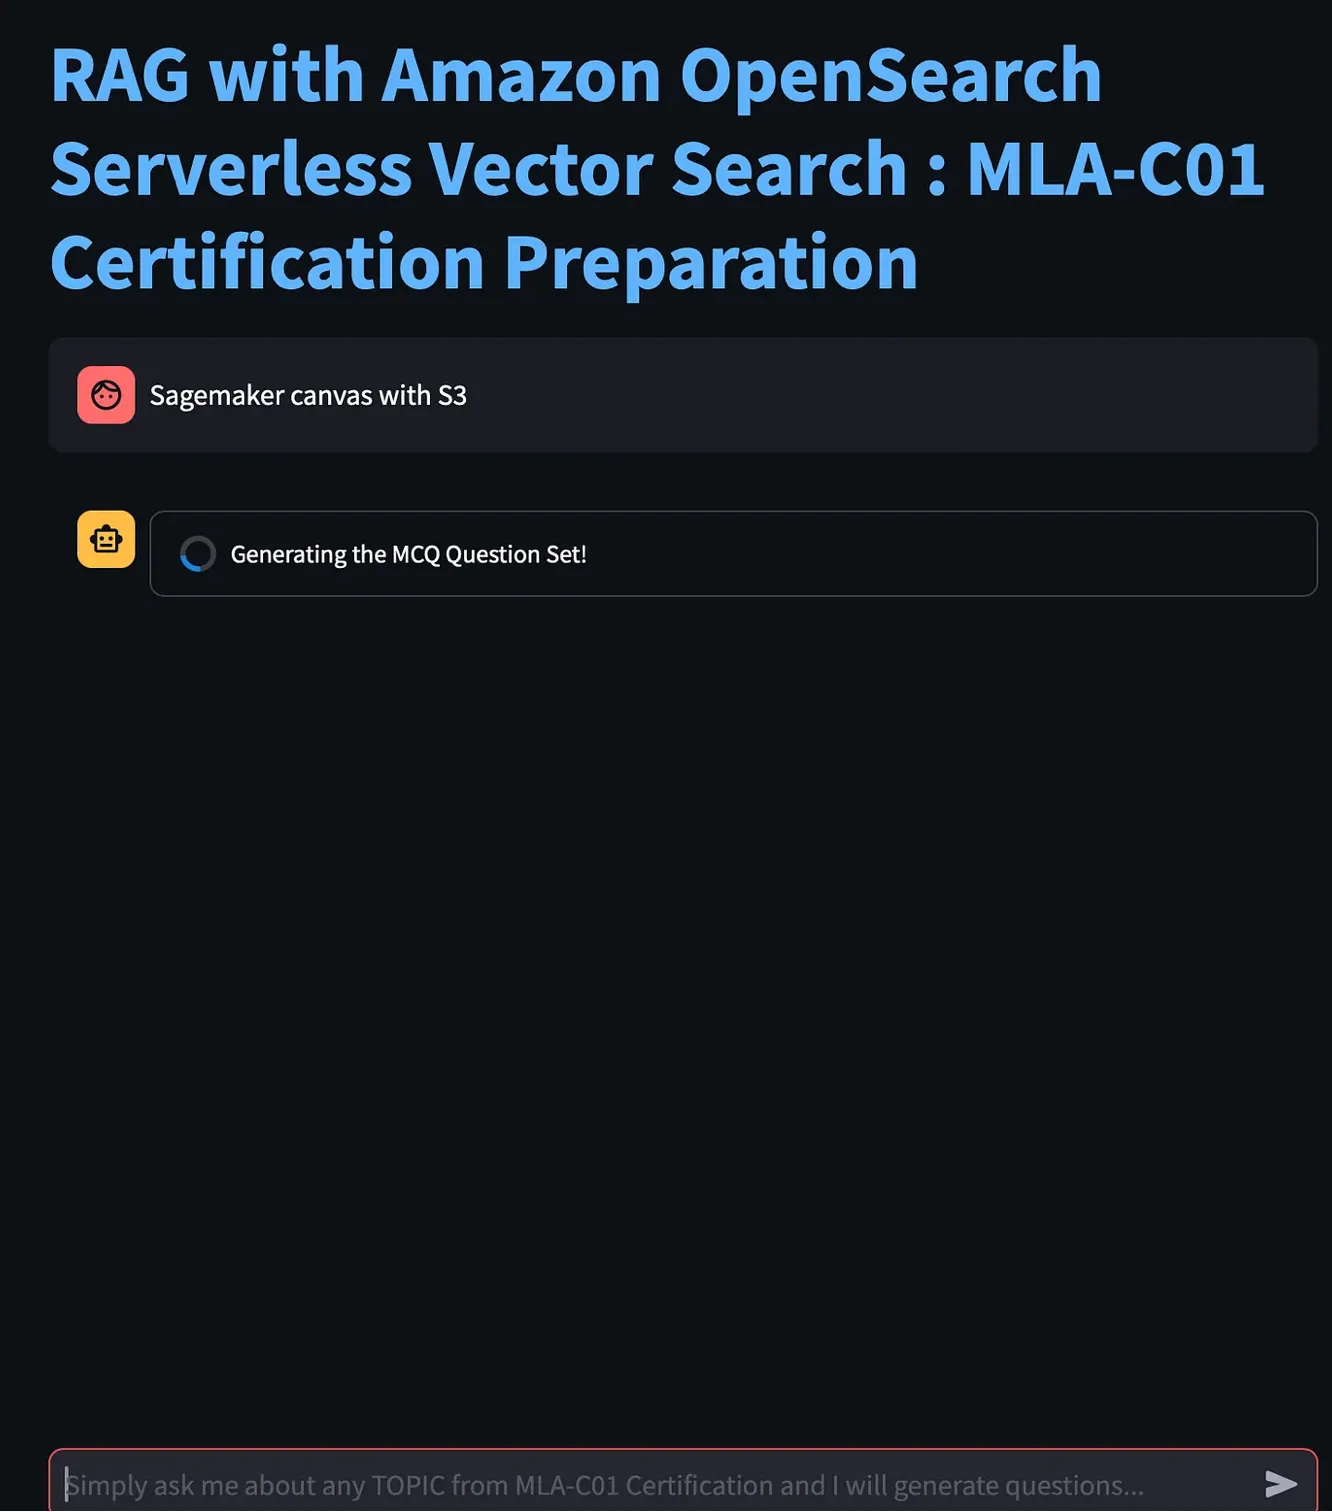
1. 使用Route53 DNS的域名启动应用程序。(例如 example.com) 2. 确保登录屏幕出现,并使用Cognito用户池的凭据登录。  Cognito 登录界面 一旦验证通过,您将可以看到我们的GenAI App,您可以使用它来准备AWS认证考试MLA-C01,生成任何与考试相关的多项选择题和答案。  GenAI 应用程序在 EKS 集群上运行 # 整理 要删掉所有资源,请运行
cdk destroy --all
运行这个命令会删除所有使用cdk创建的资源。

该命令会移除指定的资源并释放已分配的资源。

# 最后总结一下

在这系列的一部分中,我们成功地将Amazon Cognito集成到我们的Amazon EKS部署中,增强了我们GenAI应用的安全性和用户管理功能。敬请期待本系列的下一篇文章,我们将继续完善和优化我们的RAG方案。

# 回顾一下:要了解本系列之前的内容,参阅看看之前的博客帖子。

(Note: After considering the suggestions, there's a slight redundancy in "参阅看看之前的博客帖子." Since we want to avoid unnecessary repetition and maintain a natural flow, it can be simplified to "看看之前的博客帖子." Therefore, the final version would be:)

# 回顾一下:要了解本系列之前的内容,看看之前的博客帖子。

* [第一部分:使用AWS-CDK构建Amazon OpenSearch Serverless向量数据库](https://vivek-aws.medium.com/rag-solution-using-amazon-bedrock-part-1-build-theamazon-opensearch-serverless-vector-db-using-1656663a302b)
* [第二部分:使用Bedrock Converse API构建MCQ编排器](https://vivek-aws.medium.com/rag-solution-using-amazon-bedrock-part-2-build-the-mcq-orchestrator-using-bedrock-converse-api-61c2b2ce3f20)
* [第三部分:使用ECS Fargate、Bedrock和OpenSearch Serverless自动化应用程序的设置](https://vivek-aws.medium.com/rag-solution-using-amazon-bedrock-part-3-automating-application-setup-with-ecs-fargate-bedrock-b3a55af9f0a4)
* [第四部分:在ECS Fargate、Bedrock和OpenSearch Serverless中集成Cognito身份验证](https://medium.com/rag-solution-using-amazon-bedrock-part-4-integrating-cognito-authentication-with-ecs-fargate-d70b279d4f00)
* [第五部分:增强GenAI应用程序的安全防护](https://medium.com/@vivek-aws/rag-solution-using-amazon-bedrock-part-5-enhancing-security-posture-of-the-genai-application-27c8376597a5)
* [第六部分:使用事件驱动架构增强文档索引功能以增强GenAI应用程序](https://medium.com/@vivek-aws/rag-solution-using-amazon-bedrock-part-6-enhancing-document-indexing-with-event-driven-770eaf167a0a)
* [第七部分:部署到Amazon EKS](https://vivek-aws.medium.com/rag-solution-using-amazon-bedrock-part-7-deploying-on-amazon-eks-bae8a56c0ba1)

# 简单的英语 🚀

 感谢你加入[_**In Plain English**_](https://plainenglish.io)社区!在您离开之前:

* 别忘了给作者点个赞👏,然后 **关注** 她吧!
* 关注我们哦:[**X**](https://twitter.com/inPlainEngHQ) | [**LinkedIn**](https://www.linkedin.com/company/inplainenglish/) | [**YouTube**](https://www.youtube.com/channel/UCtipWUghju290NWcn8jhyAw) | [**Discord**](https://discord.gg/in-plain-english-709094664682340443) | [**Newsletter**](https://newsletter.plainenglish.io/)
* 更多平台请访问:[**CoFeed**](https://cofeed.app/) | [**Differ**](https://differ.blog/)
* 了解更多请访问 [**PlainEnglish.io**](https://plainenglish.io)
这篇关于RAG解决方案在Amazon Bedrock中的第八部分:将Amazon Cognito与Amazon EKS集成在一起的文章就介绍到这儿,希望我们推荐的文章对大家有所帮助,也希望大家多多支持为之网!
- 2024-12-21Svg Sprite Icon教程:轻松入门与应用指南
- 2024-12-20Excel数据导出实战:新手必学的简单教程
- 2024-12-20RBAC的权限实战:新手入门教程
- 2024-12-20Svg Sprite Icon实战:从入门到上手的全面指南
- 2024-12-20LCD1602显示模块详解
- 2024-12-20利用Gemini构建处理各种PDF文档的Document AI管道
- 2024-12-20在 uni-app 中怎么实现 WebSocket 的连接、消息发送和接收?-icode9专业技术文章分享
- 2024-12-20indices.breaker.request.limit 默认是多少?-icode9专业技术文章分享
- 2024-12-20怎么查看 Elasticsearch 的内存占用情况?-icode9专业技术文章分享
- 2024-12-20查看es 占用内存的进程有哪些方法?-icode9专业技术文章分享


