【JS逆向百例】爱疯官网登录逆向分析
2024/12/23 23:34:25
本文主要是介绍【JS逆向百例】爱疯官网登录逆向分析,对大家解决编程问题具有一定的参考价值,需要的程序猿们随着小编来一起学习吧!
声明
本文章中所有内容仅供学习交流使用,不用于其他任何目的,不提供完整代码,抓包内容、敏感网址、数据接口等均已做脱敏处理,严禁用于商业用途和非法用途,否则由此产生的一切后果均与作者无关!
本文章未经许可禁止转载,禁止任何修改后二次传播,擅自使用本文讲解的技术而导致的任何意外,作者均不负责,若有侵权,请在公众号【K哥爬虫】联系作者立即删除!
前言
最近有些小伙伴在微信群交流,关于爱疯登录相关加密参数的问题,同时,也有粉丝私信,想让 K 哥出关于 m1、m2 相关参数逆向的系列教程。众所周知,K 哥一向会尽力满足粉丝们的需求,本文就对该站进行逆向研究,该案例综合性较强,适合作为逆向案例来练手:
逆向目标
-
目标:爱疯 store 官网,邮箱账号登录
-
网址:
aHR0cHM6Ly9zZWN1cmU2LnN0b3JlLmFwcGxlLmNvbS9zaG9wL3NpZ25Jbj8= -
逆向参数:a、m1、m2
逆向过程
抓包分析
进入 store 登录页,输入邮箱后点击箭头,发现有数据包产生,此处我们称为 init 包,该数据包需要提交 a 等加密参数:


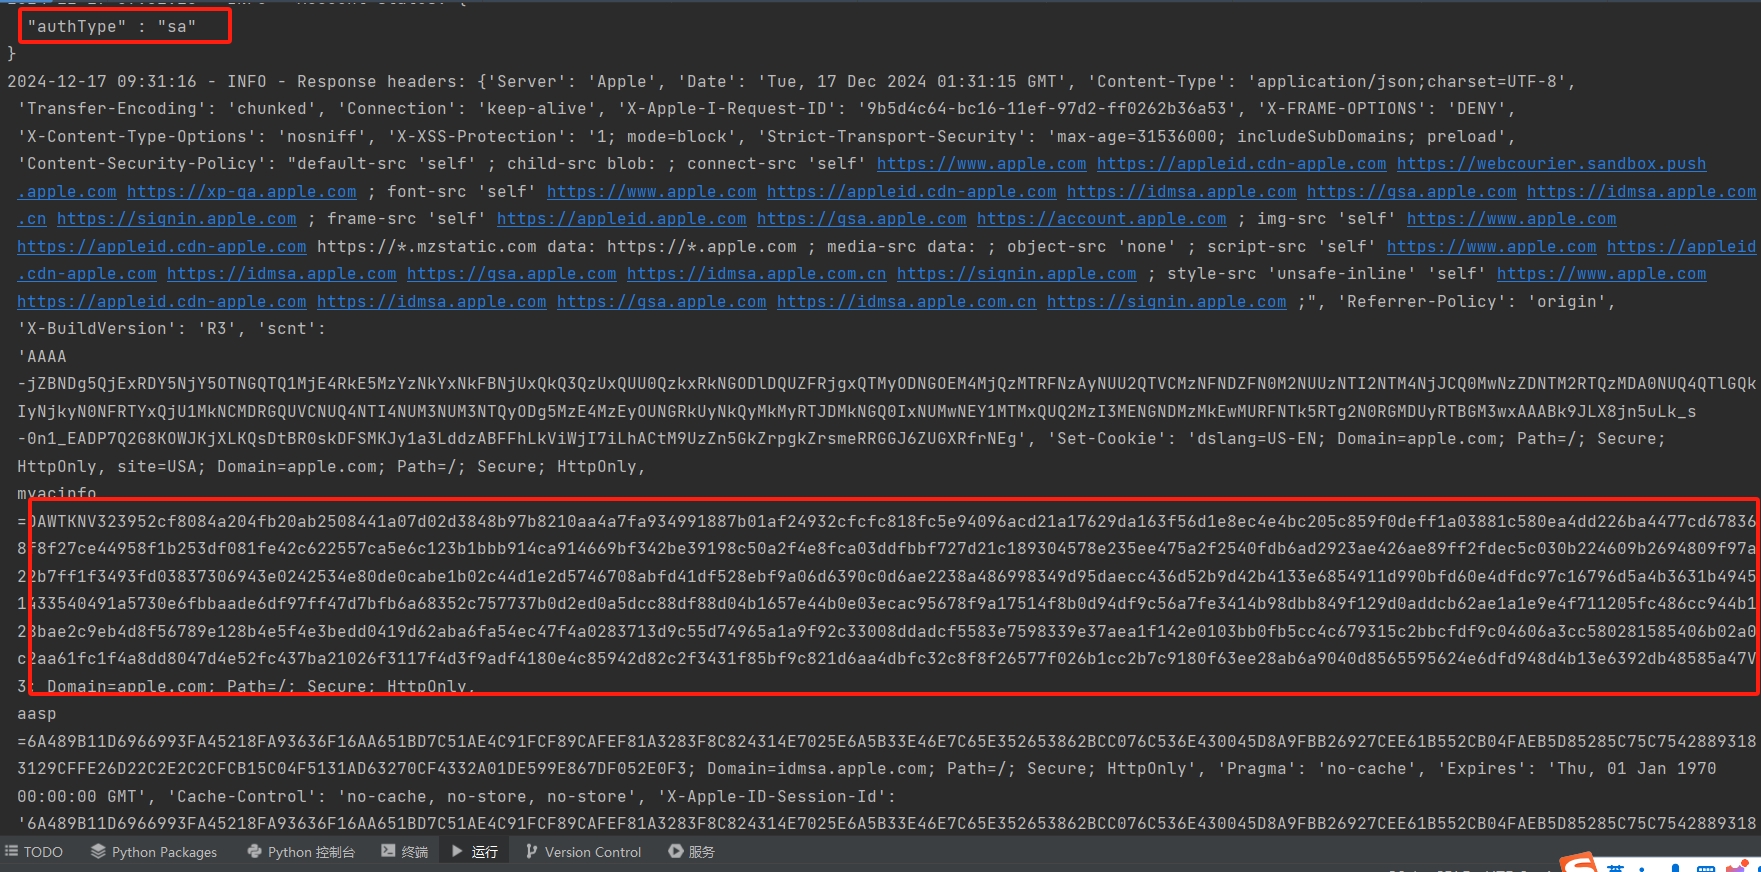
/signin/complete 接口由 c、m1、m2 等参数完成登录校验:
逆向分析
a 参数
由于该站属于全异步,该参数的定位,我们还是采用跟栈的方式,在 send 接口处打断点,向上跟栈:
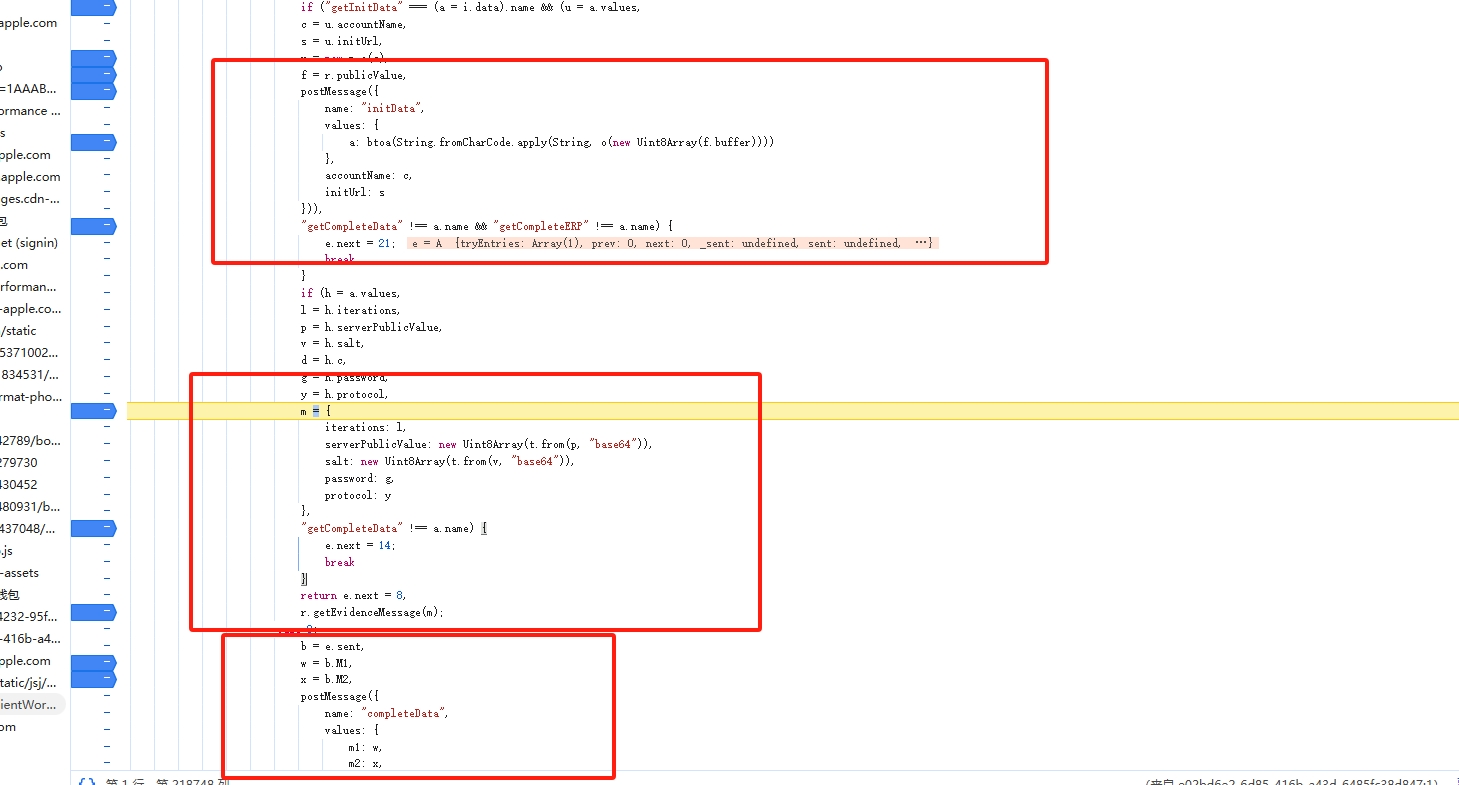
我们发现在匿名函数这里,data 于 t 中,已经生成了,继续向上跟栈,最终发现 a 值的生成逻辑如下:
a: btoa(String.fromCharCode.apply(String, o(new Uint8Array(f.buffer))))
经过分析,f.buffer 生成方式如下:
c = u.accountName,
r = new n.a©,
f = r.publicValue,
f 是通过 new 了一个 n.a 对象,然后将用户名传入后生成的,所以我们就需要找到 n 是如何生成的:
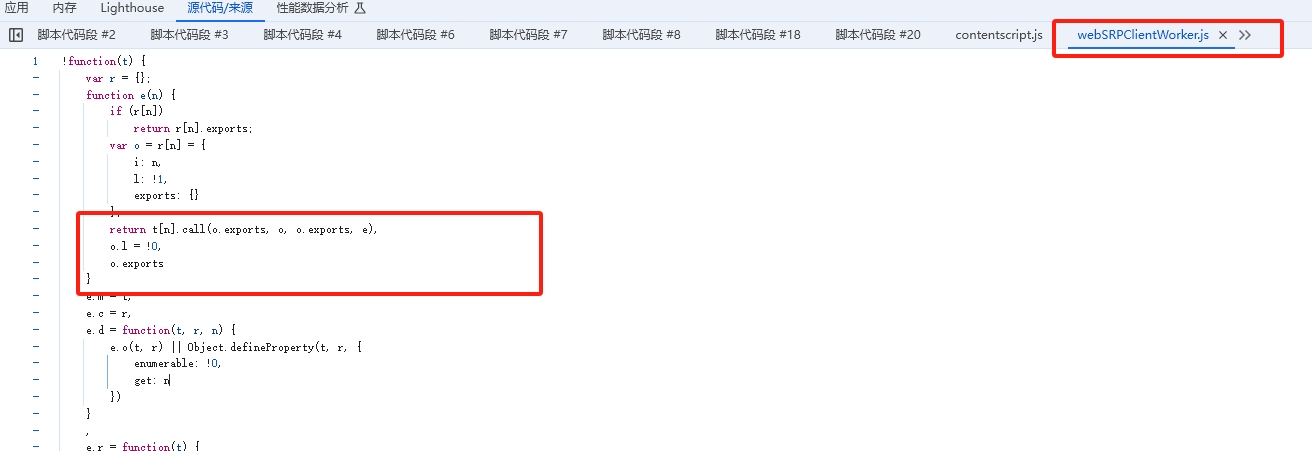
经过分析,n 是一个模块,按照之前扣 webpack 的逻辑,我们将分发器找到,在该处下断点,刷新浏览器成功在该处断下:
最终复现如下:
f 参数解决后,我们将 o 函数扣出,复现如下:
function o(t) {
return function (t) {
if (Array.isArray(t))
return i(t)
}(t) || function (t) {
if (“undefined” != typeof Symbol && null != t[Symbol.iterator] || null != t["@@iterator"])
return Array.from(t)
}(t) || function (t, r) {
if (!t)
return;
if (“string” == typeof t)
return i(t, r);
var e = Object.prototype.toString.call(t).slice(8, -1);
“Object” === e && t.constructor && (e = t.constructor.name);
if (“Map” === e || “Set” === e)
return Array.from(t);
if (“Arguments” === e || /^(?:Ui|I)nt(?:8|16|32)(?:Clamped)?Array$/.test(e))
return i(t, r)
}(t) || function () {
throw new TypeError(“Invalid attempt to spread non-iterable instance.\nIn order to be iterable, non-array objects must have a Symbol.iterator method.”)
}()
}
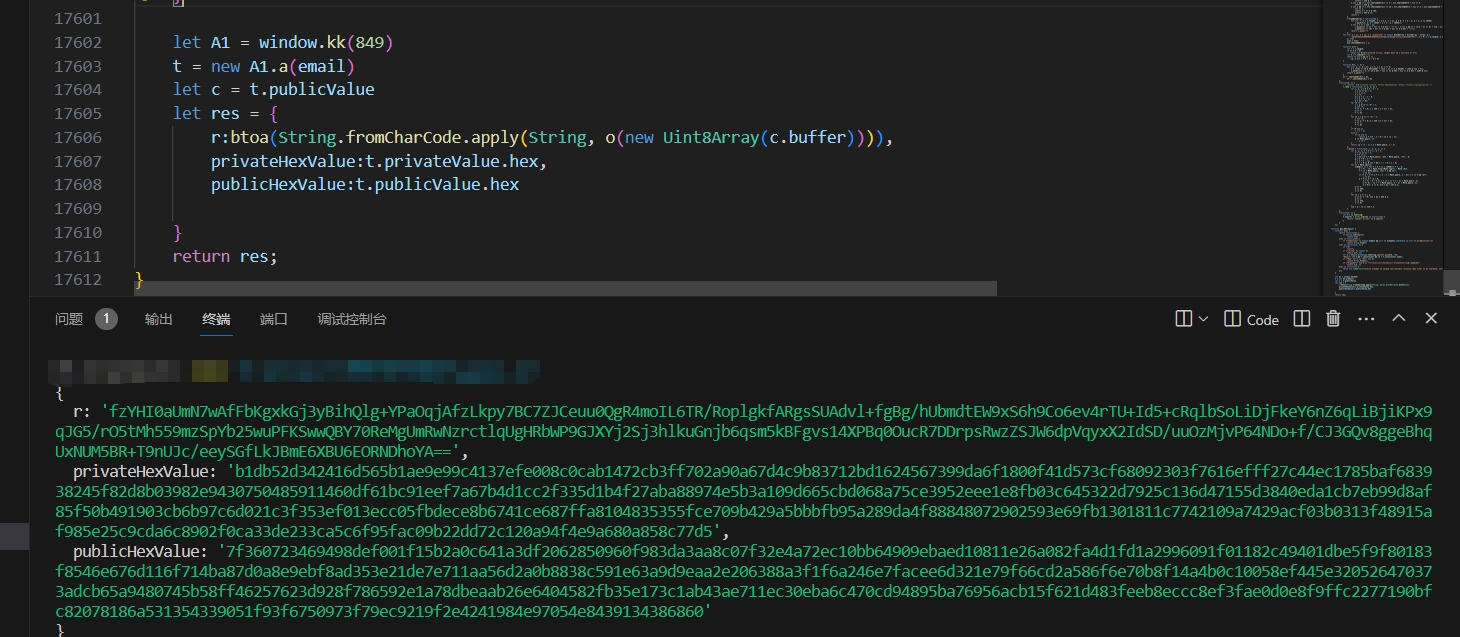
最终 a、privateHexValue、publicHexValue 参数生成如下:
m1、m2 参数
经过上文分析,a 参数已经被成功拿下,该断点下方,我们可以找到 m1、m2 参数生成的位置:
可以看到,m 参数属于异步生成,其生成逻辑如下:
m = {
iterations: l,
serverPublicValue: new Uint8Array(t.from(p, “base64”)),
salt: new Uint8Array(t.from(v, “base64”)),
password: g,
protocol: y
}
r.getEvidenceMessage(m);
getEvidenceMessage 方法生成了加密参数 m1 与 m2,其中 iterations、serverPublicValue、salt 和 protocol 为 init 接口返回的参数。
向上分析,发现 t 参数生成的地方是 t.exports = e(851),进入到 851 模块中,发现调用了 call(this, e(852).Buffer),所以 t = window.kk(852).Buffer。
继续向上分析,发现 r 同属于 a 参数中的 r = new n.a(c),所以 m1、m2 加密复现如下:
let e = window.kk(849);
window.e = new e.a(email)
var r = window.e,
t = window.kk(852).Buffer
return r.getEvidenceMessage({
iterations: iterations,
serverPublicValue: new Uint8Array(t.from(Value, “base64”)),
salt: new Uint8Array(t.from(salt, “base64”)),
password: password,
protocol: protocol
});
运行上述代码,会提示 onmessage is not defined,这是因为 onmessage 是浏览器自带的方法,所以重写失败,提示未定义,所以只需要在开头添加 onmessage= 即可:
异步转同步
m1、m2 是异步函数,无法直接调用,常规方案,可以通过 node 起接口去调用,或者主动阻塞主线程直到异步操作完成,从而将他转为同步。 例如 deasync 库提供了一种让 JavaScript 主线程“等待”异步操作完成的方式,尽管这种做法并不常见,也会带来性能上的损失,但不失为一种方案,实现逻辑如下:
const deasync = require(‘deasync’);
function mainSync(email,iterations, Value, salt, password, protocol) {
let result;
let done = false;
get_m1m2(email,iterations, Value, salt, password, protocol)
.then(res => {
result = res;
done = true;
})
.catch(err => {
throw err;
});
while (!done) {
deasync.runLoopOnce(); // 阻塞主线程直到完成
}
return result;
}
组合好 js 代码之后,我们开始构造登录接口,输入正确的邮箱以及密码后,发现接口总是提示 Enter the email or phone number and password for your Apple Account.,这代表的是账号密码错误,但是手动又可以登录,说明加密算法处理的还是有问题,细心检查后发现,问题出现在以下部分:
let e = window.kk(849);
window.e = new e.a(email)
在 init 接口与登录接口加密参数生成的过程中,我们分别 new 了一次,但是实际上这部分应该同属一个对象,如果我们 new 两次就会导致不对应的情况,经过 js 分析,new e.a(email) 是为了生成公钥和私钥,如下:
所以 new 两次就会导致这部分不对应,我们查看 privateValue 与 publicValue 的构造函数,发现它们隶属于同一个构造函数,如下:
function t® {
!function(t, r) {
if (!(t instanceof r))
throw new TypeError(“Cannot call a class as a function”)
}(this, t),
y(this, “_bi”, void 0),
y(this, “_buffer”, void 0),
y(this, “_hex”, void 0),
y(this, “_hash”, void 0),
y(this, “_base64”, void 0),
“string” == typeof r ? this._hex = r : r instanceof ArrayBuffer ? this._buffer = new Uint8Array® : r instanceof Uint8Array ? this._buffer = r : this._bi = r
}
-
这段代码根据传入的参数 r 的类型进行不同的处理:
-
如果
r是一个字符串,则将其赋值给_hex属性; -
如果
r是一个ArrayBuffer实例,则将其转换为Uint8Array类型,并赋值给_buffer属性; -
如果
r是一个Uint8Array实例,直接将其赋值给_buffer; -
如果
r是其他类型,则假定它是一个大整数(BigInt),并将其赋值给_bi属性。
-
所以将 init 接口生成 a 参数时的 privateValue.hex、publicValue.hex 与 a 参数一起导出,然后调用构造函数,将导出的 privateValue 和 publicValue 进行实例化,这样就保证了登录和 init 接口的密钥一致性。
最终 m1、m2 生成如下:
const deasync = require(‘deasync’);
function get_m1m2(email,iterations, Value, salt, password, protocol, privateHexValue,publicHexValue) {
let e = window.kk(849);
window.e = new e.a(email)
window.e._privateValue =new window.e.privateValue.__proto__.constructor(privateHexValue);

window.e._publicValue = new window.e.publicValue.__proto__.constructor(publicHexValue);

window.e.privateValue = window.e._privateValue;
window.e.publicValue = window.e._publicValue;

var r = window.e,
	t = window.kk(852).Buffer
	return r.getEvidenceMessage({
	iterations: iterations,
	serverPublicValue: new Uint8Array(t.from(Value, "base64")),
	salt: new Uint8Array(t.from(salt, "base64")),
	password: password,
	protocol: protocol
});
}
function mainSync(email,iterations, Value, salt, password, protocol) {
let result;
let done = false;
get_m1m2(email,iterations, Value, salt, password, protocol)
.then(res => {
result = res;
done = true;
})
.catch(err => {
throw err;
});
while (!done) {
    deasync.runLoopOnce();  // 阻塞主线程直到完成
}

return result;
}
只需在 python 中调用 mainSync 函数,即可完成 m1、m2 参数的生成,关于登录的账号,我会分享到知识星球中。只要手动操作可以正常登录,那么协议也可以。该站的难点就在于 m1、m2 需要与 init 接口对应,以及异步的处理。因此,就算生成 m1、m2 也不代表可以成功登录。案例相关的账号已经分享到知识星球,星球成员可以自行复制进行该站实操。
结果验证
这篇关于【JS逆向百例】爱疯官网登录逆向分析的文章就介绍到这儿,希望我们推荐的文章对大家有所帮助,也希望大家多多支持为之网!
- 2024-12-21Vue3教程:新手入门到实践应用
- 2024-12-21VueRouter4教程:从入门到实践
- 2024-12-20Vue3项目实战:从入门到上手
- 2024-12-20Vue3项目实战:新手入门教程
- 2024-12-20VueRouter4项目实战:新手入门教程
- 2024-12-20如何实现JDBC和jsp的关系?-icode9专业技术文章分享
- 2024-12-20Vue项目中实现TagsView标签栏导航的简单教程
- 2024-12-20Vue3入门教程:从零开始搭建你的第一个Vue3项目
- 2024-12-20从零开始学习vueRouter4:基础教程
- 2024-12-20Vuex4课程:新手入门到上手实战全攻略


