【九月打卡】第11天 Python办公自动化
2022/9/17 4:17:22

本文主要是介绍【九月打卡】第11天 Python办公自动化,对大家解决编程问题具有一定的参考价值,需要的程序猿们随着小编来一起学习吧!
课程名称: Python办公自动化
课程章节:第6章 玩转PPT自动化
课程讲师: 离岛
课程内容:
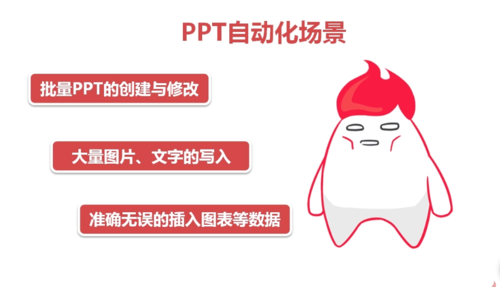
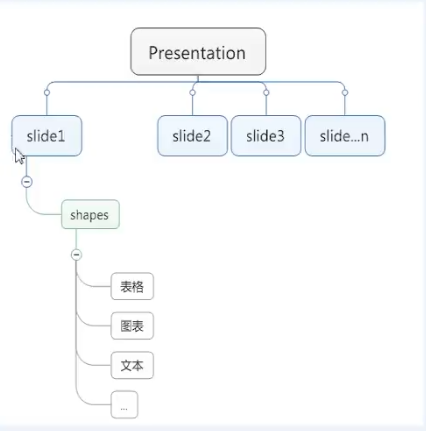
python操作PPT的主要场景如下
需要安装python-pptx 第三方模块, 用于自动化生成和更新PowerPoint文件
安装 pin install python-pptx
导入 import pptx
import pptx
prs = pptx.Presentation() #这里也可以入参,表示打开的ppt文件
prs.slides.add_slide(prs.slide_layouts[0])
prs.slides.add_slide(prs.slide_layouts[1])
prs.slides.add_slide(prs.slide_layouts[2])
prs.save('test.pptx') #这里也可以是另存为其他名字的ppt文件
#删除幻灯片
print(len(prs.slides))
del prs.slides._sldIdLst[1]
print(len(prs.slides))
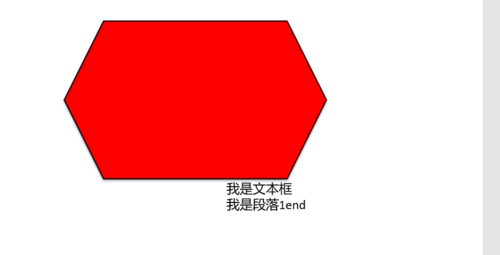
#添加文本框
text1=slide.shapes.add_textbox(Inches(5),Inches(5),Inches(5),Inches(5))
text1.text="我是文本框"
p1=text1.text_frame.add_paragraph()
p1.text='我是段落1'
p1.add_run().text='end'
title_shape=slide.shapes.title
title_shape.text='标题1'
slide.shapes.placeholders[1].text='标题2'添加图形到PPT
#添加自选图形
shape=slide.shapes.add_shape(MSO_SHAPE.HEXAGON,Inches(2),Inches(2),Inches(5),Inches(3))
#填充、边框
fill=shape.fill
fill.solid()
fill.fore_color.rgb=RGBColor(255,0,0)
line=shape.line
line.color.rgb=RGBColor(55,3,5)
line.width=Pt(2)
实现的结果如下
课程收获:
从python的角度去操作PPT, 这样不仅效率更高而且更方便操作
这篇关于【九月打卡】第11天 Python办公自动化的文章就介绍到这儿,希望我们推荐的文章对大家有所帮助,也希望大家多多支持为之网!
- 2024-12-24Python编程入门指南
- 2024-12-24Python编程基础入门
- 2024-12-24Python编程基础:变量与数据类型
- 2024-12-23使用python部署一个usdt合约,部署自己的usdt稳定币
- 2024-12-20Python编程入门指南
- 2024-12-20Python编程基础与进阶
- 2024-12-19Python基础编程教程
- 2024-12-19python 文件的后缀名是什么 怎么运行一个python文件?-icode9专业技术文章分享
- 2024-12-19使用python 把docx转为pdf文件有哪些方法?-icode9专业技术文章分享
- 2024-12-19python怎么更换换pip的源镜像?-icode9专业技术文章分享


